Knockout Roses Not Blooming? Why?

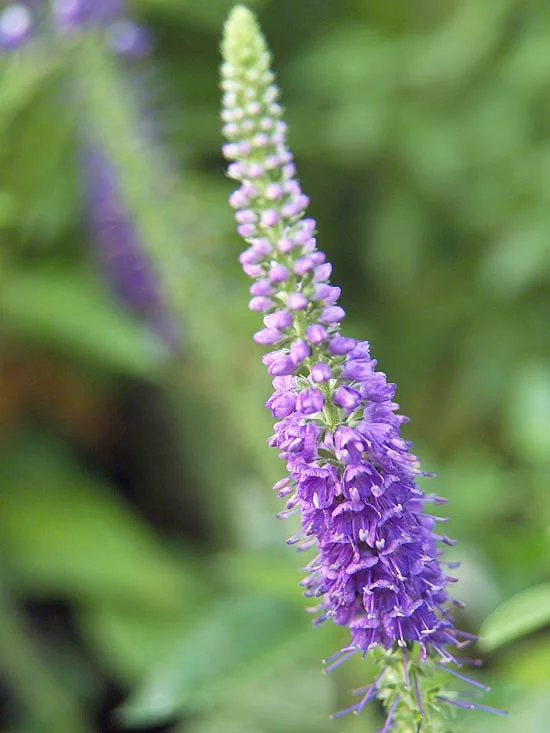
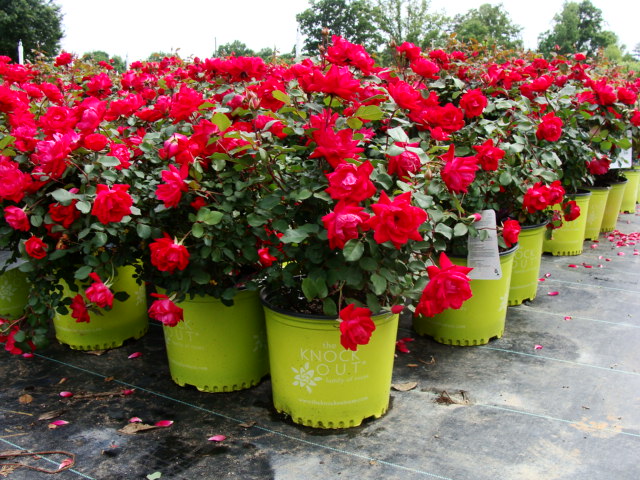
Why are my knockout roses not blooming?

Knockout roses are gorgeous.  They are fragrant.  They add color to your garden and if you are like most people who add them to your garden you look forward to watching them bloom each spring and continue their blooms throughout the summer and into the fall.

Unfortunately, for a lot of our customers they experience more frustration than joy while waiting for their roses to bloom.  

Why?

There are several reasons why your roses may not bloom.

Not enough sunlight - These roses need a lot of sun.  Unlike many things in life, this is quantifiable.  Roses need at least 8 hours of sun a day.  If there are nearby trees or shrubs that shade your rose bush for even part of the day, chances are they will not bloom well. In one case we realized that it was not a building or a tree that was causing a customer's problem but a van that parked in the same spot every day blocking the light for several hours of the day.  Yes, these bushes are that picky.

Too much food - When you feed roses too much they will not bloom.  They may become fuller with more healthy looking leaves but they will not bloom.  Try not feeding them for a while and see if this helps. When you do feed them, start with a slow release fertilizer.

Improper watering - Knockout roses need to be watered from below.  Watering them with a sprinkler may actually spread diseases such as black spot.  Try to keep the leaves as dry as possible when watering. 

Dry soil - In an earlier post we wrote about the benefits of mulch.  Mulching around your rose bushes will help to hold in the moisture and keep it consistently moist.  

Do you have beautiful knockout roses you would like to share with us?  Do you have a secret to growing these bushes that was not mentioned above?  Email us and let us know.


Yuck! What's Happening In My Mulch

You mulch your garden for several reasons but one of the most popular reasons is because it makes your yard look nicer.  So, it's a bit of a gut punch when you walk out into your newly mulched garden to find what some describe as a looking like vomit on their mulch. Don't worry, there haven't been any wild frat parties in your front yard while you slept and your dog is probably not sick.  Instead this is a natural process.

What Is Growing in My Flower Bed?

What you are seeing is fungus?  Sometimes you see it in the way of mushrooms but these piles of "pukey" material you find in your mulch serves the same purpose.  They are helping to decompose natural material in your garden.  In this case, it's your mulch.  There is no one sort of mulch that is more susceptible to this problem.

Slime Mold

In this case you are looking at a slime mold.  According to the University of Connecticut, slime molds feed on the bacteria that are feeding on the mulch, not actually eating the mulch directly.

While it causes no damage to your yard, most people choose to get rid of it.  The easiest way to do this is to shovel it off, being careful not to break it up as the small spores will spread elsewhere and continue to plague your gorgeous garden. 

If you have questions you would like us to answer in our blog click here to email your question and we will address it in a future issue.


Holes In Yard or Flower Beds?

What are these holes in my flowerbeds or yard?

Mole Hole

Mole Hole

Our customers call us on a daily basis about the holes in their yard or flower beds. Unfortunately there are a lot of things that could be causing the problem.  

It could be kids, your dog, squirrels, groundhogs, or voles. Unless you actually see it happen though, it is mind boggling. Where do they come from and what damage are they causing?

 Luckily there are clues that help us figure out these issues.


Vole Hole

Vole Hole

Follow the Clues

Mole, vole and insect holes are usually throughout the yard.  But each animal digs differently, leaving different clues.  Mole holes are covered by a hill of dirt, while vole holes are not.  Both of these holes are bigger than holes left by worms and birds.  Whereas Groundhog hole are much easier to spot as they are several times bigger than the biggest mole hole.

Be careful when excavating these holes to find the cause though as some of them may be made by wasps looking for a place to lay eggs.

Earthworm Hole

Earthworm Hole

The location of the hole might also be a clue. Holes nearer to trees may be chipmunks or worse, rats.  Holes in your flower bed could be squirrels or birds looking for food.  This time of year you might also notice a lot more 1-inch holes left by earthworms who are particularly.  Earthworms are easy to suss out by looking for a granular hill around their holes.

And finally mother nature herself may be the cause.  Water running away from your home may create a stream underneath your yard leading to a cave in.

If you need help discovering or solving your issue, please call us

Fire Pit - Safety Tips

Adding a fire pit is a great way to extend the use of your outdoor living space each year.   By adding a fire pit you can start spending more time outdoors earlier in the spring and later in the fall and create an inviting living space.

However, there are a few safety rules you should consider when installing a fire pit and when using it.

Fire Pit - Installation Safety

  1. Build On Even Ground - This is important from a seating standpoint as you don't want your guests to tip towards the fire.  But it is also important because you want to avoid letting the fire escape the fire pit area.
  2. Create Space - When deciding on placement for your fire pit make sure to build at least 10 feet from your home and the nearest tree, fence, or other flammable items.
  3. Choose Stones Wisely - Use stones that are rough and dry.  Using stones that maintain moisture, such as river stones, can be dangerous as these stones can explode and cause serious injury.

Fire Pit - Guest Safety

  1. Avoid Accelerants - Gasoline or lighter fluid can escape the fire pit putting your home and your guests at risk.  Instead always use firewood and kindling that can be contained within the confines of the fire pit.
  2. Plan For The Worst - Make sure there is a fire extinguisher of some sort near to hand.  This can be a fire extinguisher, a bucket of sand or even your garden hose. This way if something does go wrong you can be ready immediately.
  3. Educate Your Guest - This is especially important with young children.  In addition keep an eye on guests as the evening progresses. Also keep an eye on your pets.
  4. Never Leave the Fire Unattended - Even if it appears to be out, unless it is cool to the touch there is still a danger of fire. Never leave the fire unattended.

If you are interesting in creating an outdoor living space with a fire pit but would like professional help creating it, call today.


5 Perennials To Keep Your Garden Blooming

The blooms and blossoms of spring bring a new joy to life.  You have probably already noticed many plants blooming in your garden this spring. But spring is not the only time to have a blooming garden and bringing seasons long color to your garden can bring equal joy.  Try planting these five perennials to have your garden blooming all year long.


Hellebore

This two foot wonder plant will be one of the first plants to bloom in your spring garden but it's beautiful green foliage is what makes it a summer long treat for your garden.  What makes us call this a wonder plant?  It's not only drought resistant but deer and rabbit resistant as well.

Variegated Solomon's Seal - 

The variegated coloring on this perennial will help your garden look fresh and clean all summer long and fills in a garden nicely.  Surround it with more colorful plants such as bleeding heart plants to enhance it's natural beauty.  


Japanese Forestgrass

Japanese Frostgrass not only adds beautiful color but also amazing texture to your garden.  Perfect for the shadier areas of your garden.  These grasses are stunning when paired with golden or purple flowering plants such as hostas and bugbane


Catmint

This is one plant you will  always find in my summer garden.  We are become big fans as it fills in an empty bed and with a hard pruning half way through the summer blooms into early fall.


Border Blue Veronica

Another colorful plant to bloom in your garden all summer long is the Border Blue Veronica. This two foot tall plant is gorgeous when planted alongside the lower growing  moonbeam coreopsis.


When we run through our neighborhood or drive through someone else's it is easy to look at a gorgeous garden and feel envy, believing we can never achieve a similar look.  But gardening is as much science as art.  With effort and research, finding the right plants to plant together, and planning a garden is possible for any of us.  

Of course, we are always here to help.  If you don't know where to start or are simply too overwhelmed.  Please call us to schedule a design and installation appointment.  We do this every day and love to help turn your yard into the garden of your dreams. 

Pavers - Which Type Is Right For Your Outdoor Living Space

When designing patios and walkways for your outdoor living space, it is important to keep a style in mind.  Are you looking for something rustic, chic, simple,  stark or utilitarian?  What are you trying to accomplish with this space? 

After making this decision it is time to choose the type of pavers that work best for your style.  Most people are surprised by how many types there are to choose from.  And even within these different types of pavers there are different colors and finishes that make your choices unique to you and help your yard be a standout in the neighborhood.


Next to energy efficiency, perhaps no other market trend is changing the landscape of new-home design than outdoor living,
— David Barista, editor-in-chief of Professional Builder

Natural Stone Pavers

Stone pavers are quarried and cut and can be from a local quarry or from across the country. Natural pavers are sure to make your hardscape unique feature to your garden. The downside to natural stone is that it is more expensive and can get quite pricey if you are looking for special shapes.  Examples of natural stone pavers are granite, travertine, limestone and marble.  There are several finishing options as well. Some make the stone look antique while others give a much more polished look.


Brick Pavers

A visit downtown Annapolis will give you a great idea the look you can achieve with brick.  It's a great look for historic houses or houses going for a more colonial look. Brick is quite a bite cheaper than natural stone and comes in many different colors and styles.


Flagstone 

Like natural stone, flagstone can add a uniqueness to your garden not seen in every neighbor's yard.  However, it is a quite a bit less expensive making it easier to use throughout your garden for both patios and walkways.  Because each piece of flagstone is shaped different you can create a more rustic look with this paver. Flagstone comes in many colors and  textures.


Concrete Pavers 

These pavers are becoming more popular and make a great addition for a more modern patio or walkway.  You can use them to create a grid effect with mosses or grass planted in between.  Or you can add pebbles to match for a cleaner look.


Interlocking Pavers

There are many other benefits to interlocking pavers.  They are easy to repair, come in a wide variety of colors, shapes and finishes and can be removed if you need to get to plumbing or other utilities buried underneath them. The downside of these pavers is they include being more expensive and the fact that weeds can grow up through the cracks.


Permeable Pavers

If you are looking for a sustainable solution for your garden, try permeable pavers. They are best used in large walkways and driveways. According to Landscaping Network, " these surfaces help ground water recharge by allowing water to flow into open spaces between the materials. These porous materials also filter pollutants and solids from the water as it percolates through the surface." The cost for these pavers varies based on a number of factors. 

Easy Ways To Be Bay Friendly

A few mornings back John Bridges, the owner of 4 Season Landcare spent a few moments just being grateful for the natural beauty of where we live, then he took this photo and shared it with the rest of us.

It was a great reminder of the natural beauty of our area and our responsibility to help keep it beautiful.  Today I want to share a few simple and some fun ways we can go about being more Bay friendly in our yards. 

  1. Thoughtful planting - Native plants and are great for the environment because they need less water and fertilizer.  Even better they take less of your time and energy each year.
  2. Careful disposal- Taking a few minutes to think about where you will dispose of harsh chemicals goes a long way towards keeping the Bay healthy and happy.  Never pour chemicals down storm drains.  
  3. Creative shorelines - Imagine creating a Bay friendly habitat in your backyard.  You can do this by creating a Living Shoreline.  Learn more with this great brochure from the Chesapeake Bay Foundation.
  4. Plant a tree - Planting a tree can reduce your utility bills but it is also good for the bay. Trees help prevent erosion but they also soak up fertilizers and other chemicals before they get the chance to make it to the waterways.
  5. Mow High - Taller grass helps prevent weeds and allows for deeper roots which again, helps prevent runoff.  It also allows grass to stay greener during droughts.